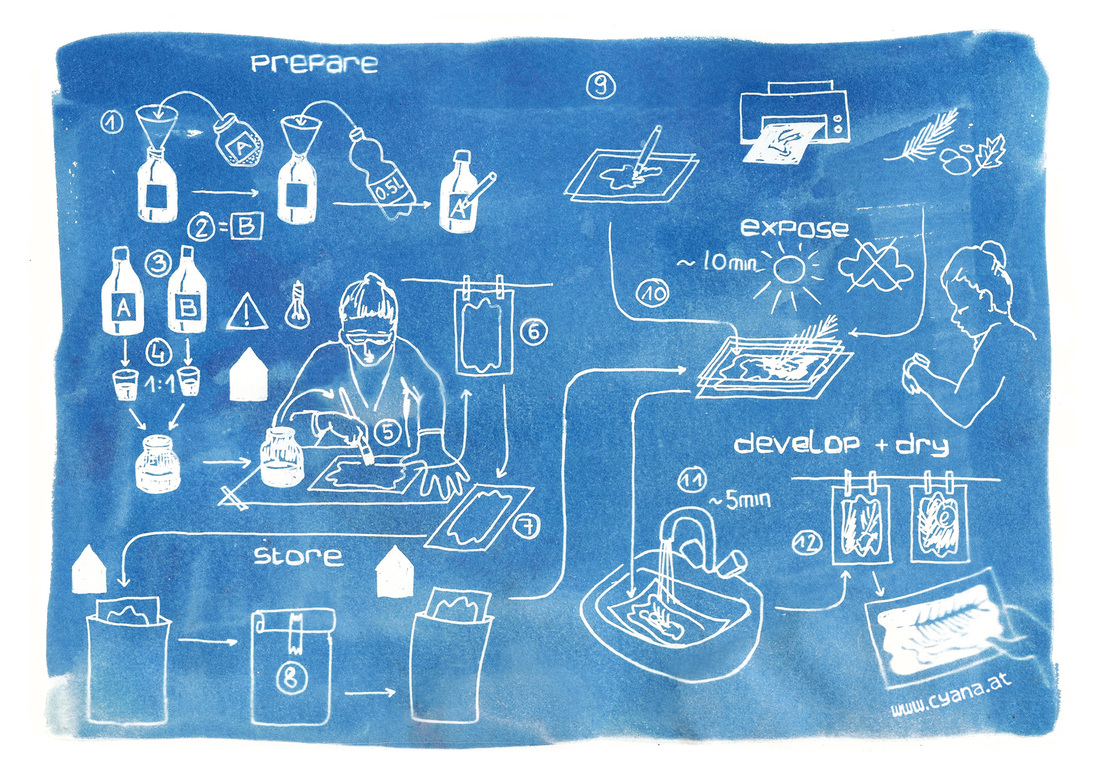


The Cyanotype process
Go to edpuzzle.com and sign in as a student. Watch the two videos about the Cyanotype process.
Safety First - We are going to be spending a few minutes to learn about the MSDS sheets (Material Safety Data Sheet) for each of the chemicals that we are going to be working with.
1. Go to the following web link to learn How to read a MSDS:
https://www.osha.gov/Publications/OSHA3514.html
https://www.seton.com/blog/2010/06/how-to-read-the-nfpa-diamond-and-color-bar-system
2. Go to the following web links to learn about the two chemicals we are going to be working with to create a Cyanotype print:
https://beta-static.fishersci.com/content/dam/fishersci/en_US/documents/programs/education/regulatory-documents/sds/chemicals/chemicals-p/S25488.pdf
https://beta-static.fishersci.com/content/dam/fishersci/en_US/documents/programs/education/regulatory-documents/sds/chemicals/chemicals-f/S25315.pdf
And for comparison we are going to look at household bleach
https://beta-static.fishersci.com/content/dam/fishersci/en_US/documents/programs/education/regulatory-documents/sds/chemicals/chemicals-s/S25552.pdf
Read through each of the pages to get a sense of the chemical, potential hazards and procedures to follow in the case of and accident.
3. On your website a heading to the history of photography page called Cyanotype this page must include:
As you create your Cyanotype print keep these ideas in mind and add them to your page after completing the experiment.
Go to edpuzzle.com and sign in as a student. Watch the two videos about the Cyanotype process.
Safety First - We are going to be spending a few minutes to learn about the MSDS sheets (Material Safety Data Sheet) for each of the chemicals that we are going to be working with.
1. Go to the following web link to learn How to read a MSDS:
https://www.osha.gov/Publications/OSHA3514.html
https://www.seton.com/blog/2010/06/how-to-read-the-nfpa-diamond-and-color-bar-system
2. Go to the following web links to learn about the two chemicals we are going to be working with to create a Cyanotype print:
https://beta-static.fishersci.com/content/dam/fishersci/en_US/documents/programs/education/regulatory-documents/sds/chemicals/chemicals-p/S25488.pdf
https://beta-static.fishersci.com/content/dam/fishersci/en_US/documents/programs/education/regulatory-documents/sds/chemicals/chemicals-f/S25315.pdf
And for comparison we are going to look at household bleach
https://beta-static.fishersci.com/content/dam/fishersci/en_US/documents/programs/education/regulatory-documents/sds/chemicals/chemicals-s/S25552.pdf
Read through each of the pages to get a sense of the chemical, potential hazards and procedures to follow in the case of and accident.
3. On your website a heading to the history of photography page called Cyanotype this page must include:
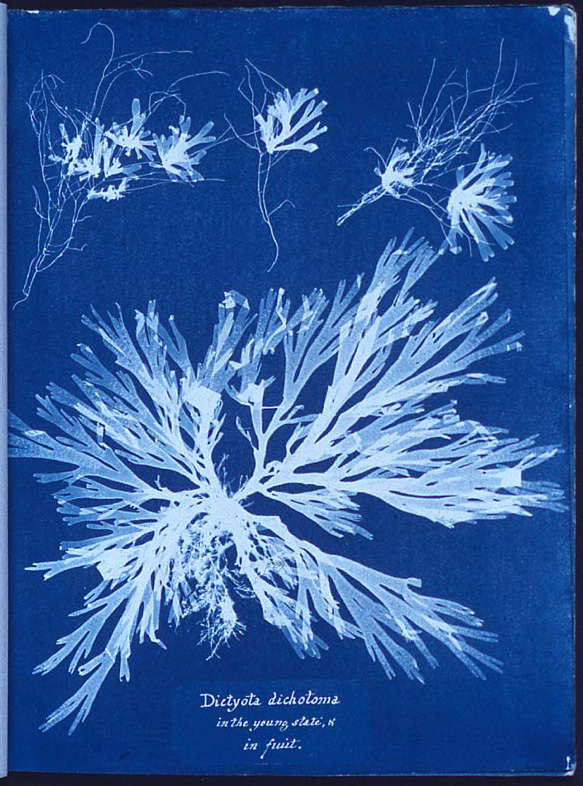
- Based on the classroom discussion about the cyanotype add a few short sentences about the history and the process.
- List the chemicals used and their Health, fire and reactivity numbers.
- List two procedures to follow if there is an accident(oral,skin, or eyes)
As you create your Cyanotype print keep these ideas in mind and add them to your page after completing the experiment.
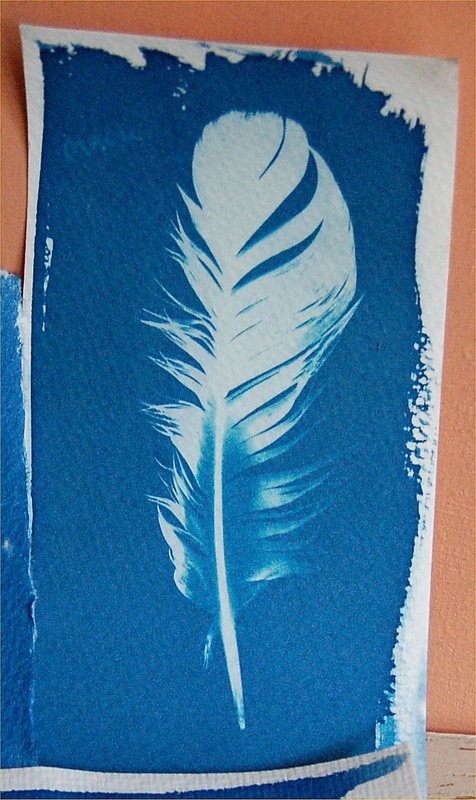
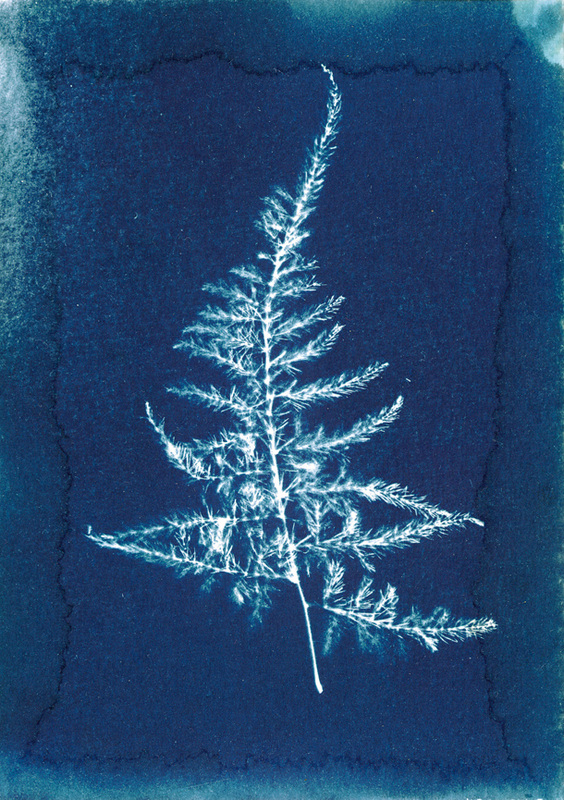
- Pictures of the process to create a cyanotype (before, during and after the print is exposed)
- Answer the following questions about what you observed:
- What color was the cyanotype emulsion when it was applied to the paper?
- What happened when it was placed outside in the sunlight? Why?
- When your print was removed from the glass and the objects were removed, what did you observe?
- Describe what happened to the exposed areas of the print and the unexposed areas of the print when it was placed in water. Why do you think this happened?
- Any final thoughts about the way it looks, feels or your observations of the process?
