Midterm Portfolio
We are almost done with the first half of the class. Over the last few months we have covered a lot of topics, so I want us to take a little time to go back through all of the work that you have produced and collect the best images for the Midterm Portfolio. We will be learning some new skills in Lightroom to help collect all of the best images into one folder and then learn some techniques to start enhancing the image. So far in class I have purposely avoided teaching these techniques so that you would have the opportunity to learn to get it right in the camera and not rely on fixing the image in the post production. But as we get ready to move into the next term we will be doing a lot more manipulation of your images.
For this assignment you will:
1. Collect the best examples from each shooting assignment in Lightroom using Ratings and Smart Collections.
2. Export all of the best images to a folder called Midterm Portfolio.
3. Enhance all of the images using the Basic Panel options.
4. Export all of the images to a folder called Portfolio Enhanced.
5. Create a new page on your website called Midterm Portfolio. Add titles to label each technique, then add a gallery with the before and after images for each technique.
so let's get started.
https://www.youtube.com/watch?v=gFtedPEi2EA
How to Rate Your Photos

1. In your Lightroom Library choose one of your assignment folders. I'm looking at a folder of Lines. I am viewing the library in the Grid view. Switch to the Grid view by hitting (G) in the key board.
2. Notice that when you hover over an image two arrows and five dots appear at the bottom.
3. This image has been rated with 5 stars, stars are a great way to quickly assign a rating to images, 5 being the best to 1 being the worst. The easiest way to rate a photo to select the photo you want and press the number(1-5) on the keyboard. The other option is to click on the dot under the photo that corresponds with the star you want to assign.
4. If you are in the loupe view, (L) on the keyboard or double click an image, you can also rate the photo here or with the numbers on the keyboard(my prefered method). We are only going to be collecting the best photos, so for now just rate 5 stars to the best photos of each assignment.
5. In the left side panel switch to another folder to rate the best photo. Repeat this step for all of the shooting assignments this term.
How to Create a Smart Collection
Now that all of the assignmnets have the best photos rated as a 5 star, we need to bring them all together into one location. But we do not want to actually move or remove them from their original folder. Also we do not to make duplicates or copies. Lightroom solves this issue by using Smart Collections. It is a way to collect images based on Metadata, this is any information that is attached to the image. We will be using the 5 star rating. But we could search for other things like keywords, file type, ISO, F-Stop or Shutter Speed.
6. On the left panel click on the (+) to the right of the word Collections.
7. From the drop down menu, click on the "Create Smart Collection" item.
7. From the drop down menu, click on the "Create Smart Collection" item.
8. Title the Smart Collection to be" Midterm Portfolio".
9. Set the criteria of the Smart Collection. Choose rating in the first drop down. Then set the second to be "is greater or equal to". The set it to 5 stars
10. Then click on Save.
9. Set the criteria of the Smart Collection. Choose rating in the first drop down. Then set the second to be "is greater or equal to". The set it to 5 stars
10. Then click on Save.
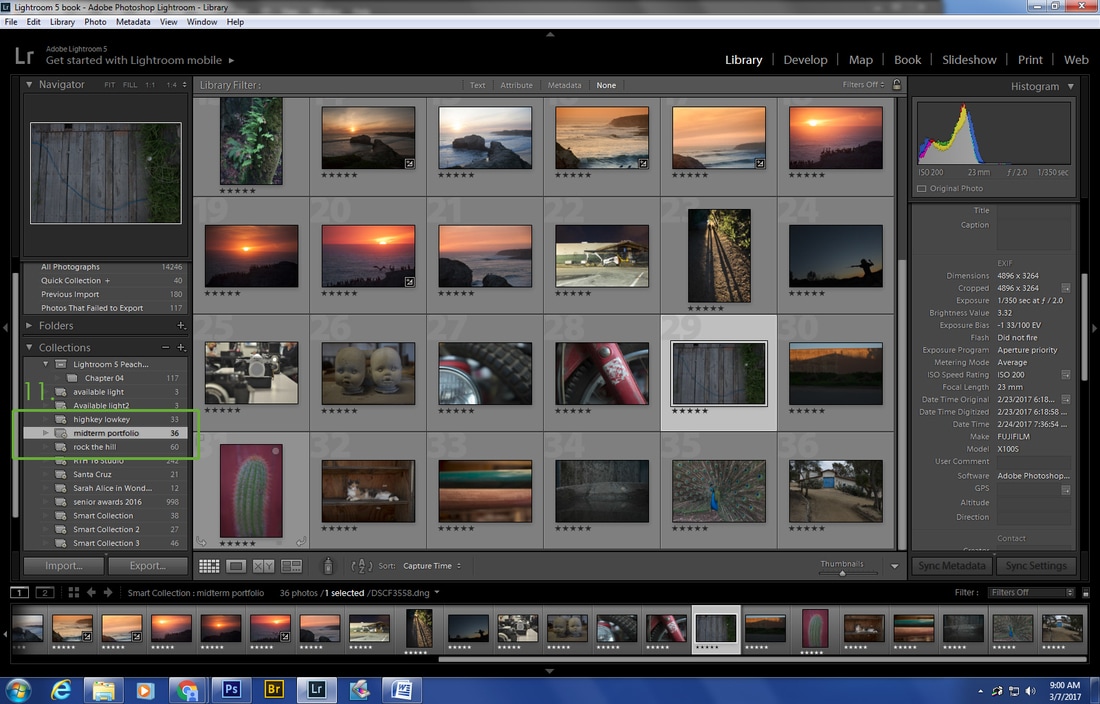
11. Now in the left side panel there is a new smart collection and it is displaying all of the 5 star photos. This is a smart collection which means that it is always learning. If you later mark anything other image that meets the criteria of the collection, Lightroom will find it and add it to the collection. Also if you don't want an image to stay in the collection simply rate it lower that 5 and it will drop out of the collection
Congratulations you have now collected the best work you have produced so far this term.
Now let's see if we can make them even better.
https://youtu.be/niUKH8G2lrM
Congratulations you have now collected the best work you have produced so far this term.
Now let's see if we can make them even better.
https://youtu.be/niUKH8G2lrM
Enhancing the Best Images
Now for the fun. There are endless possibilities once you start to enhance your photos. We are going to start with the basics. The first thing to keep in mind is that the goal should be to make the image the best image that it can be. There is a lot a flexibility within the digital file to push and pull the image to more closely match the image that you visualized when you were shooting. This is no different then the printing process for film. Ansel Adams would manipulate the way he exposed and developed the film. He spent countless hours in the darkroom adjusting the exposure and contrast of his print, dodging and burning to get the tones of his image to match what he had pre-visualized.
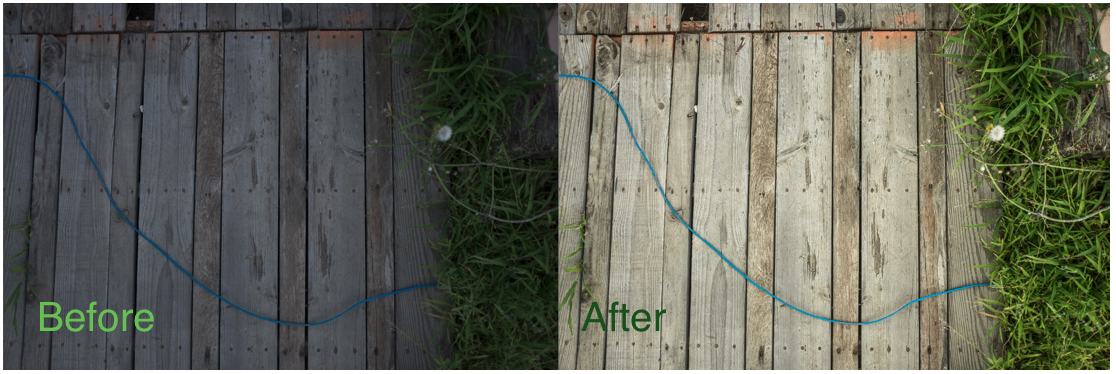
For this example I chose an image that was a little bit underexposed. I liked the curved blue line of an ethernet cable running across the rough wood of the palette deck; then disappearing into the grass. It is an interesting juxtaposition between nature and technology. But the shot in the camera is lacking. I wanted to brighten up the image, strengthen the grass and the blue line, and increase the texture of the wood.
Select your own image in Lightroom, then click on the Develop button at the top right of Lightroom next to the Library. Below click through each of the slide to explore the Basic Panel. Follow along with your image and start to make the adjustments need to enhance your photo.
Repeat this process for all of the images in your Portfolio Collection. Once all of the images have been enhanced export the files to a new sub folder called portfolio enhanced. Double check that the files are being resized to 2000 pixels and that the quality is set to 100 prior to hitting export.
