For this vocabulary exercise you will be breaking into groups of 5. Each student will be selecting on of the following terms to create a Verbal Visual Word Association(VVWA).
Once you have completed your card share out with your group so that you all have a good understanding of all of the words. These vocabulary words are really the building blocks for the rest of the term.
- Soft Light
- Shadow edge transfer
- Open Shade
- Angle of incident
- Angle of reflection
- Center Diamond - The Word
- Top Left - Definition of the Word
- Top Right - Image that reminds you of the definition
- Bottom Left - Analogy/ personal association
- Bottom Right - How it is used in photography
Once you have completed your card share out with your group so that you all have a good understanding of all of the words. These vocabulary words are really the building blocks for the rest of the term.
Open Shade
Open Shade is another easy way to create soft light on a bright sunny day. Find an area of solid shade, not dappled light. Place your subject as close to the edge of the shade as possible with out being in the sun. This will allow the open sky to act like a huge soft box. It will create soft even light and large reflections in the eyes. Using a reflector is a great way to add some pop to the portrait and create catch lights in the eyes. If you are using a silver or gold reflector you can even create a direction of light with the fill.
Questions
Go the following Link https://digital-photography-school.com/6-ways-of-using-reflector-to-take-better-portraits/ and answer the 5 questions on your website.
1. As a "Pro" what is the first thing you would consider when taking a portrait?
2. What does fill light do?
3. How do you use a reflector as a main light?
4. How can you use the reflector to create a dramatic effect?
5. Which reflector can give a photographic face-lift?
1. As a "Pro" what is the first thing you would consider when taking a portrait?
2. What does fill light do?
3. How do you use a reflector as a main light?
4. How can you use the reflector to create a dramatic effect?
5. Which reflector can give a photographic face-lift?
Shooting Assignment
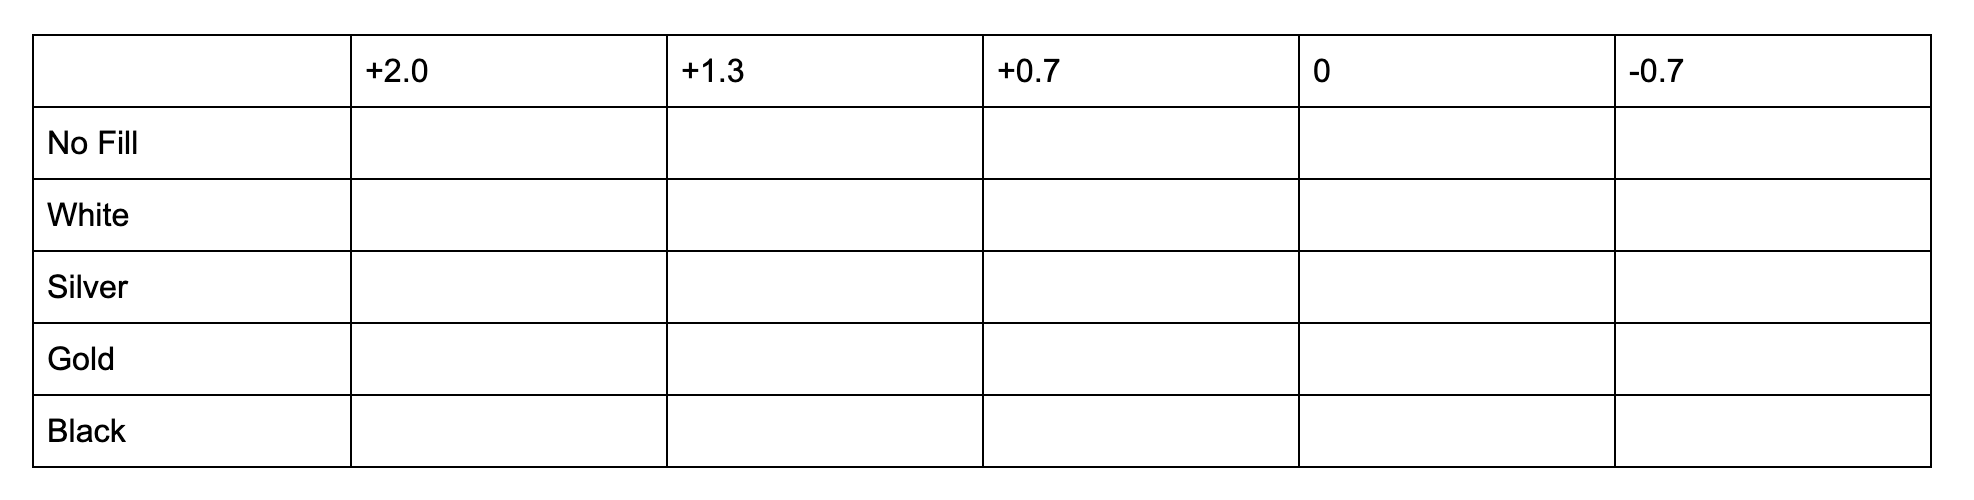
For this assignment several of the Lighting conditions may cause the light meter to be fooled. To make sure that you get a good exposure for each of your lighting directions we are going to use a technique called bracketing. Basically bracketing means that you will be shooting not only at the normal exposure, but at set interval above and below the normal exposure. For each direction of light use the light meter to expose: +2, +1.3, +0.7, 0, -0.7. This will give you about a 3 stop range of exposure. Set up the camera in the following way to make your shoot easier.
If you are shooting from home and using the Lightroom App
If you have a DSLR at home
1. Fill from inside the Shade( 3 sets for directions Butterfly, Rembrandt and Split)
For this assignment several of the Lighting conditions may cause the light meter to be fooled. To make sure that you get a good exposure for each of your lighting directions we are going to use a technique called bracketing. Basically bracketing means that you will be shooting not only at the normal exposure, but at set interval above and below the normal exposure. For each direction of light use the light meter to expose: +2, +1.3, +0.7, 0, -0.7. This will give you about a 3 stop range of exposure. Set up the camera in the following way to make your shoot easier.
If you are shooting from home and using the Lightroom App
- Shoot in the profession mode
- Keep ISO and Shutter speed on Auto. Use exposure compensation to bracket.
- Use a linger focal length if possible
If you have a DSLR at home
- Set the camera mode to (A) Aperture priority
- Make sure that the camera is set to ISO 100 and JPG Fine
- Use either the 50mm or the 70-300mm lens
- Set the the F-stop to the lowest setting
- Use the +/_ exposure compensation button to adjust the exposure to the earlier specified numbers
1. Fill from inside the Shade( 3 sets for directions Butterfly, Rembrandt and Split)
2. Fill from outside the Shade( 3 sets for directions Butterfly, Rembrandt and Split)
If you shoot all of a direction at the same time you can skip the no fill the second time. Here is an example of what that would look like.
Frontal: No fill, Inside shade White, Silver, Gold, Black, Outside the shade White, Silver and Gold. That works out to 40 images per direction of light.
*****Notice there is no Black for the outside the shade.

3. Post your Images
Add and label your best Open Shade shot to the Best of Gallery. Also create a gallery with all of you images of Open Shade.
